Pages

Tuesday, 22 January 2013

100% Wholewheat Banana Bread

Bananas being the tropical fruit available all year round is a must entry in our weekly ration. Well, I can have it for a day or two in a week, but I am not too much of a fan to go bananas over bananas! :-) So often I make them into breakfast smoothies and whatever is left, I give it away to my maid. Yesterday again I came across the case of over ripe bananas and I was at a loss. I didn't want my maid feel that we dispose off everything that we do not want on her, so I sat and searched for some recipes using bananas. 

Wholewheat Banana Bread

I have made banana bread/cake before and it turned out pretty well and I had something similar in mind this time as well. However, as I am deliberately trying to make healthier versions of my favorite dishes, I was quite adamant on finding a wholewheat banana bread recipe. To cut it short, I managed to find and bake one and this definitely is a keeper.

Ingredients

Ripe banana - 3 medium, sliced
Wholewheat flour -  1 3/4 cup + 4 tablespoon cocoa powder (I was falling short of 4 tablespoons from the box I keep my wheat flour and hence adjusted with cocoa powder and it did help)
Baking powder - 1 teaspoon
Baking soda - 1/4 teaspoon
Salt - 1/2 tablespoon
Olive oil - 1/4 cup
Brown sugar - 6 tablespoons
Egg whites - 2 
Yogurt - 8 tablespoons
Cinnamon powder - 1 teaspoon
Dark chocolate chips - few tablespoons for garnishing (optional)

Preparation

1. Preheat oven at 180 degree Celsius. Line a loaf pan with butter paper and grease with olive oil

2. In a mixing bowl, beat together sugar and olive oil using an electric mixer, until well combined.

3. Add the eggs and beat to combine. Add bananas, yogurt and cinnamon powder. Mix well by beating using the mixer.

4. Sift together the flour, cocoa powder, baking powder, baking soda and salt. Add this to the mixing bowl in portions, beating to combine after every addition.

5. Transfer the batter to the loaf pan. Sprinkle chocolate chips and bake in preheat oven for 1 hr 10 minutes or until a toothpick inserted comes out clean.

6. Serve warm for breakfast or as snack.


Friday, 18 January 2013

Kodampuliyittu Varutharacha Njandu Curry (Crabs in Roasted Coconut & Kokum Gravy)

Seafood is definitely my favorite; particularly those cooked in Kerala style, I can go totally crazy and can keep having them in all 3 meals of the day. Talking about seafood reminded me of our trip to Korea. Pradeep was sweet enough to take me to South Korea for 8 days vacation in the wake of 2011. It even coincided with my birthday that year and although it was not pre-planned, given his convincing skills he made it sound like a birthday present too! (these men have their way to twist things the way they want.) As it was January, the places we visited were all snow clad and on some days the temperature even went to minus degree. For this reason most of the food they served were steamboat sorts. One fine day the guide took us to a specialty seafood steamboat restaurant and even we were excited. But when they actually unveiled the seafood spread, I and Pradeep sort of looked at each other because we were not familiar with anything we saw there on the table. Whatever I saw there was exotic and I felt ashamed to have been from a coastal city and settled in another that I have never seen half of the things from the ocean. There was a group which even tried live octopus and that was totally uncalled for. By the end of it all, we said bye-bye to the restaurant owner and the guide (no, we did not eat a thing) and walked up to the nearest 7-11 store bought a few cups of noodles and had our dinner. So my point was, when I say I love seafood, I do not mean the exotic kind!


Kerala Njandu Curry


Yesterday from the fish lady I bought crabs and anchovies. The crabs were just medium in size but I bought it. This was the 2nd time I was cooking crab curry; the first time it was too watery although it tasted good. This time again I was worried about the same issue because I did not have an earthen pot, because such dishes call for earthen pots so that the gravy reduces well and gives the right consistency. Anyway, I just went head following the recipe I saw here (minus the homemade garam masala part)

Before you even get started, preparation is a little elaborate, but the end result is well worth the time you spend. 


Ingredients:

For the curry

Crabs - 6 small or 4 large ones, cleaned and legs separated (I have no clue how to clean any of the seafood varieties including fish, my maid does it for me)
Onion - 1 medium, finely chopped (original recipe calls for shallots)
Green chilies - 3 large, sliced lengthwise
Ginger - 2 inch piece, crushed
Garlic - 6 cloves, crushed
Turmeric powder - 1/4 teaspoon
Red chilly powder - 1 teaspoon
Ground pepper - 1 teaspoon
Salt - to taste
Kudampuli (kokum) - 5 pieces
Curry leaf -  1 spring
Garam masala - 1 teaspoon


For the roasted coconut mix

Coconut - 1 cup, grated
Onion - 1 medium, chopped
Curry leaf - 1 spring
Turmeric powder - 1/4 teaspoon
Chilly powder - 1 teaspoon
Coriander powder - 1 teaspoon
Cumin seeds - 1/4 teaspoon
Olive oil - 1 tablespoon

For tempering

Coconut oil - 2 tablespoon
Mustard seeds - 1/2 teaspoon
Curry leaves - 6 leaves
Onion - 1 small, finely chopped
Dried chilies - 2, halved

Preparation:

1. In a pan heat olive oil and roast all ingredients for the roasted coconut mix. Start by adding the coconut, curry leaf and onions and stir fry it until the coconut turns brown and gives out a nice flavor. This will take about 10 min in medium heat. 

2. Add turmeric powder, chilly powder, coriander powder and cumin seeds and roast for another couple of minutes. Switch off and let this cool.

3. Heat up a heavy bottomed pot (earthen pot is ideal) and add the cleaned crabs along with legs (you can crack the legs for easy eating) chopped onions, green chilies, garlic, ginger, turmeric powder, red chilly powder, ground pepper, kudampuli, salt and curry leaf for making the curry.

4. Add water enough to cover the ingredients in the pot, bring to boil and cover and cook for nearly 10 minutes in medium heat.

5. In the meanwhile, grind the roasted coconut mix into a smooth paste with 5 tablespoons of water. 

6. Open the crab curry and add the roasted coconut and spice mix. Stir to combine, cover and cook for another 6 minutes.

7. Add the garam masala and let it cook open for another couple of minutes until the gravy thickens. Adjust salt and seasoning at this stage. Transfer to serving bowl when cooked.

8. Heat up coconut oil in a small pan. Splutter mustard seeds and add curry leaves, onions and chilies. When the onions are nicely browned, pour this over the cooked crabs.

9. Serve with steamed rice.


Shredded Cabbage with Grated Coconut Stir Fry a.k.a Cabbage Thoran

Saturday is my new best friend! I have full freedom with her to fool around, do what I like, how I like and when I like. And on Saturdays minus Pradeep, I am in the mood for elaborate cooking. Unlike normal days, I had decided today's lunch menu yesterday night itself - Rice with fried anchovies and crab curry! (recipes will soon follow, everything is ready and I am drooling and waiting for Pradeep to show up). 


Kerala Cabbage Thoran


I had no plan to cook vegetable, because every time I cook it we have it the first day and it lies inside the fridge for 2 days and later I ask my maid to take it. The only instance when this does not happen is when I make cabbage stir fry, Pradeep just loves it. So anyway today I was ready to toil inside the kitchen (surprisingly everything went smooth today) and why not make him triple happy! :-) [no bad intention, it just happens that we are going out for shopping today and he is yet to deliver quite a lot of promises he made on my b'day] 

Cabbage thoran as we call it in Kerala is nothing but just cabbage stir fry with grated coconut. A must entry in most of the sadyas, this is quick and wonderful accompaniment to go with rice. 


Ingredients

Cabbage - 1/2 medium, shredded
Coconut - 1/2 cup, grated
Onion - 1 medium, chopped (shallots are what we use, as I did not have that used onion)
Green chilies - 3 large, chopped
Garlic - 5 cloves, chopped
Turmeric powder - 1/4 teaspoon
Mustard seeds - a pinch
Curry leaf - a few springs
Olive oil - 1 tablespoon (use coconut oil, if you want it the traditional way)

Preparation

1. Heat up olive oil in a wide mouthed pan, splutter mustard seeds and add curry leaves. Stir fry for a few seconds.

2. Add the shredded cabbage, stir well to combine, close with a lid and cook covered for a couple of minutes, until the vegetable is tender.

3. In the meanwhile, coarsely grind  together grated coconut, onion, garlic and green chilies in a blender with very less or no water.

4. Open the pan, add turmeric powder, salt and then the coconut mix. Stir to combine. Cook for another couple of minutes and switch off the stove. 

5. Transfer to serving dish and pair it with rice. This will taste good as sabji for rotis too.

Paratha Quesadillas With Egg Vegetable & Cheese

If only the quick healthy breakfast picks were endless or like as they show in the movie Spy Kids, I could have those tablets which when microwaved or baked turn into amazing dishes! Well, I will keep my hope alive because nothing is impossible with the kind of technology we have these days.

Winter is really getting on me and I find it very very hard to wake up in the morning, leave alone the cooking part. Every evening after my work I sit with my laptop browsing beautiful dishes and drooling at them but for some reason I really cant get myself to cook anything :-( What a sad state of affairs? I am totally bored of cheese toast (been my breakfast and lunch for past 3 days) and yesterday I somehow made up my mind to cook something different and nice for today's breakfast. (well I did not make it for breakfast but for dinner; that's another story)


Paratha Quesadilla


Aimless browsing can gift you with wonderful ideas and that led to to today's recipe. Although I started with frittata, I somehow bumped into quesadilla recipe (thanks to wrong tagging by someone). We both enjoy wraps of all kinds and have always wanted to try these at home but never got a chance. So the item was finalized and quesadilla it was. I had a pack of frozen paratha, which could be the wrap, and onions, carrot, tomatoes, eggs and cheese could make the filling (in fact I could not be choosy here, as it was already time to replenish the grocery).

I made the filling yesterday night so that morning I need not compromise with my sleep. Pradeep reached home late yesterday and that's when he told that he has to leave at 6 tomorrow - I was like no way you are getting breakfast! And hence I made it for dinner tonight.


Quesadilla with Egg Vegetable Filling


Filling enough for breakfast or light dinner, this dish has immense scope of experimentation or improvisation. I am sure each and every one of you will find your own way to spice it up!


Ingredients

Frozen parathas - 5 (you can even use leftover roti or naan, or can make it fresh if you wish to)
Onion - 1 large, chopped finely
Carrot - 1 small, chopped finely
Tomatoes - 1 large, chopped finely 
Green chilies - 2, chopped
Garam masala - 2 teaspoon
Turmeric powder - a pinch
Eggs - 3 large, lightly beaten with a pinch of salt
Cheese spread - 5 tablespoon (1 tablespoon for each quesadilla)
Olive oil - 2 tablespoon
Salt to taste


Preparation

1. For the Filling : Heat 1 tablespoon oil in a pan and add the onions. Fry until transparent and add the carrots. Roast the vegetables by stir frying in the pan for a couple of minutes. 

2. Add the tomatoes and fry until mushy. Add turmeric powder, garam masala and salt to taste. Mix well to combine. Keep aside.

3. In the same pan, heat 1 tablespoon oil. Add green chilies and the beaten eggs. Scramble the egg and when it is almost done, add the vegetables and mix well. Check salt and adjust seasoning. 

4. For Quesadilla: Heat up a pan, take one frozen paratha and prepare as per instructions. Once the paratha becomes nice and crispy, spread one tablespoon of cheese spread over it, add as much filling you may need in one half of the paratha, and fold it. Using a wooden spoon, press the paratha with care and turn it to cook the other side. Transfer to serving place.

5. Repeat the process with rest of the parathas and filling. This recipe should give you 5 such quesadillas.

6. Enjoy as it is or you can even further cut the paratha into half and serve it with white dipping sauce. If you cut it even smaller portions, these can be a great appetizer to serve! 


Thursday, 17 January 2013

All-time Favorite Cocktail Sambar Idlis

Soft and white mini idlis immersed in spicy traditional sambar!

If there is one South Indian dish that has truly gone global then that has to be Idli! From the tiny glass shelves in the street side make-shift shops these wonderful yet humble South Indian breakfast has made its way to 5-star and even 7-star hotels within and outside India. If you think about it, there's hardly anything attractive about this dish save for its health quotient. It is simple rice and urad dal batter steamed to perfection! Versatile enough, idli goes pretty well with anything you can probably think of. However, its relationship with sambar is sort of inseparable and for that reason the most beautiful. 

Sambar Idlis


I have been to all of the South Indian states and have been lucky enough to taste idlis from everywhere. I remember going out on an idli date too (well, that is a funny story)! In Vizag (the place I am based in now) there used to be a shop called "Murugan's Idly" that served about some 30+ or more varieties of this dish! The "bhavans" chains of restaurants in Chennai have satiated my taste buds a number of times and the best I still remember is what one of my dear friends ordered for me when I was down with low BP and was resting in her house - amazing Saravana Bhavan mini idlis oozing out ghee and immersed in spicy sambar and I satiating one at a time to my heart's content! That was the first time I tried mini idlis and it was until a month or so ago when I got to try it again at one of our acquaintance's place. They had served it as a snack, something sort for of a cocktail idli; whatever it was they were marvelous. I felt so fascinated with the mini version and the many ways of serving it, I went ahead and got the mini idli trays. 

Mini Idlis in Tray


Blame the winters, for the past few days I have not been making good breakfast. Today we had the sub-way sandwich we packed yesterday night. So  with the guilt working within me, I prepared idly/dosa batter today. And tomorrow morning, I am going to relive my sambar idlis days but the mini version. 

Ingredients

Rice - 1 cup, washed and drained
Urad dal - 1/2 cup, washed and drained
Salt to taste
Mini idly trays

Preparation

1. The previous day, soak rice and urad dal for at least 4 hours. In a blender, grind the soaked rice and dal together with enough water to make a smooth batter. (You can put it for soaking around late noon and grind it by late evening).

2. Pour the batter into a big enough vessel, (which has enough space for the batter to rise) close with a lid and leave it overnight for fermentation. If the climate is very cold, better keep it above your fridge or preheat oven and leave it inside. The temperature needs to be warm for the batter to ferment nicely.

3. Next morning, stir the batter with salt to taste.

4. Liberally grease the mini idli moulds with ghee. Use a tablespoon and spoon out the batter carefully into the tray. Believe it or not, this is an act of precision :-) which you will realize when you do it.

5. Steam in the idli maker until done. When done, use a spoon to carefully remove the idlis from the mould and keep aside.

6. Take sambar in a bowl and immerse a good number of idlis in it. Eat it as it is and feel "nirvana"! :-)

Improvement Ideas

If you do not want to take too much of a trouble then buy ready made batter and proceed from step 3 above.
You can serve these dry mixed with your own favorite chutney as an appetizer.
Mini idlis are also good for making upma.

Thursday, 10 January 2013

Wheat Bread Sandwich with Homemade Chicken Spread and Roasted Tomatoes

Isn't as lengthy a preparation as the name suggests!


Sandwiches, burgers etc are the best go grab snacks or meals, especially on busy days. The popularity of these snacks have skyrocketed so much that every other street has a shop serving these. Well and good! But I have never been (and will never be) a big fan of sandwiches and burgers, although I still fancy the rice burger (I would definitely want to try making that at home once) that Mos Burgers used to serve when we were in Singapore. It was unique and equally tasty. This is when I wish India could have been more welcoming towards multi-national F&B stores and not just BPOs and KPOs! 


Sandwich with Cheese Spread

So wondering why I made this sandwich? Because I made a chicken spread and sandwich was one thing to go with it :-)


Ingredients

Wheat bread - 6 slices, grilled
Cabbage - 6 medium, leaves (as I did not have lettuce)
Tomatoes - 2 large, sliced in 1/4 inch thickness
Pepper - 1 tablespoon, ground
Salt - 1 teaspoon
Chicken spread - 6 tablespoon (find the recipe here)
Tooth pick - 6 to secure the sandwich


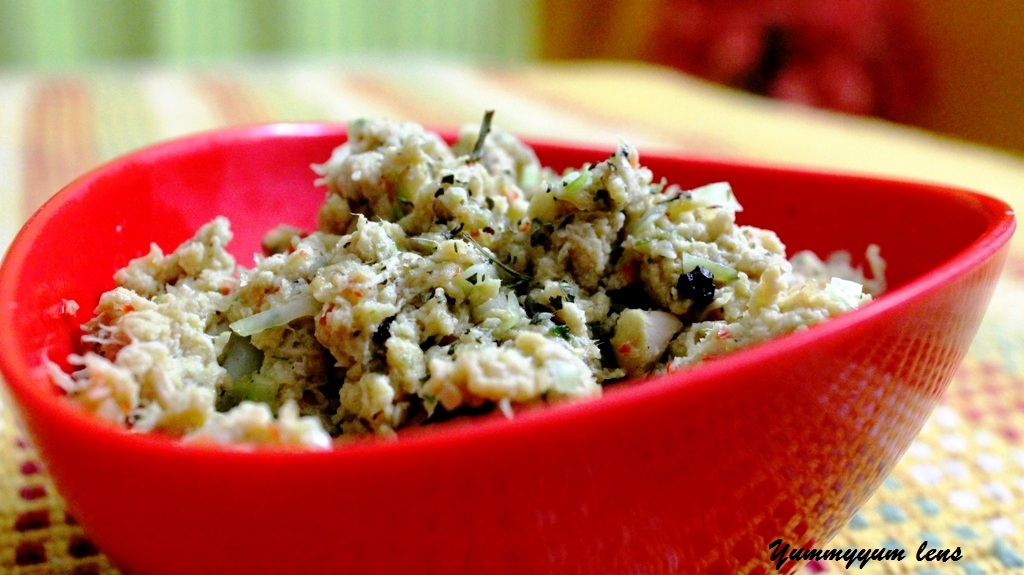
Easy Chicken Sandwich Spread


Preparation

1. Mix ground pepper and salt and rub it over the sliced tomatoes; keep aside for at least 15 min
2. Heat up a pan in medium heat, dry roast the marinated tomatoes until almost crispy
3. Take a slice of bread, apply 1 tablespoon of chicken spread (or more if you wish), top it with a leaf of cabbage and 4 slices of roasted tomatoes.
4. Cover with another slice and secure with a tooth pick
5. Repeat the process to finish the batch.


Homemade Chicken Sandwich Spread

Goodbye to boring cheese spreads and jams!


Today I found out another good thing about experimental cooking; it really puts your brain to work, unlike the route dishes that come to you automatically. You have to check what is available, conceive an idea, execute it with improvisation and yeah, be totally contented at the result! And the best part, you get to name your project, you yourself evaluate it, approve it and then push it forward for more appreciation. Isn't that just wonderful!


Homemade Chicken Sandwich Spread

Well, something like that created this chicken sandwich spread. I had a few pieces of chicken lying in the freezer (do not ask me for how many days it has been lying there, he alone knows) and was determined to use it up today before my dear hubby comes up with another grilled chicken plan. Apart from that, I had to cook something for dinner too and I had promised him a grilled sandwich and hence went ahead with this chicken spread plan. 

Sandwich with Chicken Spread

It is easy, you know what goes into it and that way perfectly safe and healthy way to munch your sandwich. You can leave it a bit watery and use it as a dip too! 

Ingredients

Boneless chicken - 3 medium pieces, cooked and shredded
Onions - 1 medium, chopped
Garlic - 10 cloves, chopped
Dried red chilies - 3-5, chopped
Cabbage - 5 tablespoon, shredded
Pepper - 2 tablespoon, ground
Coriander leaf - 3 springs
Fresh cream - 4 tablespoon (you can even use cheese spread or mayonnaise instead of this)
Milk - 4 tablespoon
Olive oil - 2 tablespoon

Preparation

1. In a mortar or blender, mix together onions, garlic and dried chilies into a coarse paste.
2. In a blender add the shredded chicken pieces, coriander leaves, fresh cream and milk and mix well. Fine chunks of chicken pieces can remain as that adds on to the beauty.
3. Heat up oil in a pan, add the ground onion, garlic and chilly mix and saute until oil separates.
4. Add pepper, the chicken mix and cook for a couple of minutes, stirring occasionally. Switch off stove.
5. Serve on bread or as a dip and enjoy!


Tuesday, 8 January 2013

Breadcrumb Crusted Grilled Veggies

Tasty yet nutritious wholesome meal for lunch or dinner!


The worst phase of unhealthy eating is when you had guests over and you end up with a good portion of leftovers. In my case, the leftovers are always in the form of soft drinks and store bought chips. Well, why I am mentioning this is because I am munching crispy kukure when writing this blog! I tried not to but I had to :-)

Grilled Mixed Veggies & Shrimp with Bread Topping

Since morning I have been walking around with this bag of Kurkure, I had it by my side when working, when having my lunch and now when writing this blog! I have had my share of junk for today and hence thought of eating something healthy for dinner. 

I have always imagined, what if the world suddenly turns vegetarian? All those delicious seafood (I really do not care about meat) recipes I have treasured would go waste! As a kid I never fancied vegetables, but as and when I grew up, I started liking them but not to the extend to opt out seafood. So to ensure that we get our dose of vegetables, I experiment and this dish is the outcome of such a trail and error method.

Grilled Veggies

Ingredients

Cauliflower - 1 small (or 1/2 of a medium), cleaned and cut
Green beans - 1 bunch, cut in 1 inch pieces
Shrimps - 8-10, deveined and cooked (optional)
Onion - 1 small, chopped
Garlic - 6 cloves, chopped
Red chilies - 3, dried and chopped
Turmeric powder - 1 pinch
Garam masala - 2 tablespoon
Salt to taste
Olive oil - 2 tablespoon
Breadcrumb - 1/2 cup

Preparation

1. Crush together onions, garlic and chilies with no water. Keep it aside.

Cooking

2. Heat oil in a pan and roast the vegetables along with turmeric powder, salt and garam masala, until they are partially cooked. Take care to ensure the vegetables are still crunchy.
3. Mix in the cooked shrimps and saute for a couple of minutes.
3. Marinate the mix with crushed onion, garlic and chilly mix for about 15 min
3. Transfer the veggies and shrimp mix into a baking tray, top it with breadcrumbs and in medium grill, cook for about 14-15 min or until breadcrumbs is browned.

Serving

4. Serve hot as it is or as a side dish.

Monday, 7 January 2013

Vellayappam (Or Aappam)

Super soft and fluffy rice pancakes for breakfast!


So last Saturday was one of the most eventful days, I mean in the recent past. We had invited a few guests over (from Pradeep's work place); I had an elaborate all vegetarian menu ready and went on preparing one by one. I like experimenting and I love to do it for my guests; although not always. Saturday is mostly half day for my husband and I was expecting him to be back home around 2, and he had to buy a few ingredients too. I started with making mushroom filling for wontons, vegetable stew (to pair with appam), mix for kothu paratha, parboiled the potato wedges and cauliflower.  Everything was going well and good until around 12, I received a call from Pradeep saying he would be late, like around 4.30. I panicked, like I always do, because I hate to keep cooking or spend my break thinking that I am not done yet. Well, I didn't lose my cool. I went ahead and experimented with a small batch of dessert, and cooked the rice. At around 5.30, I received another call saying the families who were supposed to come may not be able to because there was one issue at work. I had no comments. At 6, I received another call saying that the guests can still manage to come just that they would be a bit late. I was happy because I didn't want the food to go waste. I took bath thinking that might help cooling me down and it did. Two of my friends dropped by and I gave them wontons to taste; things were back to normal. Now, at around 7, I receive another call from Pradeep saying that the guests will not be able to make it because the men have to stay on-board late. I know it was not our guests fault, neither my hubby's but the thought that my one day effort went waste, did pinch me worse than I imagined! Finally, we called our friends home, we had fun and they were kind enough to stay till 1 AM, cut my birthday cake and click a few snaps. That did mean a lot to me, in fact as they say, all is well that ends well :) So, the next few posts will be from the vegetarian menu that I prepared for my guests, and to start with, it is vellayappam or appam, which is one of the traditional Kerala breakfast dishes. 


So appams and idiyappams (string hoopers) are always in my menu when I call some non-keralites home. Most of them appreciate kerala food and so I keep one in my menu for them. Appams look good and feel tasty only if the batter is well fermented. I have had my own share of failed attempts before I could get this right.  These days we get the readymade powders which makes it quite an easy deal, but again, I have tried that too and nothing can beat the homemade batter. The feeling after seeing the nice little holes when you pour the fermented batter on to the tawa is just beyond words to describe!   Once the batter is made, the dish is pretty simple to make.

Ingredients

Rice - 2 cups
Urad dal (uzhunnu) - 1 tablespoon
Cooked rice - 3/4 cup
Coconut - 1 small, grated
Sugar - 5 to 6 tablespoons
Salt to taste
Yeast - 1 teaspoon
Coconut milk - 50 ml, thick

Preparation

1. Soak rice and urad dal for at least 4 hrs. Grind it along with cooked rice and grated coconut, with enough water to make moderately thick batter. Pour the batter into a big vessel, which has enough space for it to rise when fermented.
2. In about 25 ml lukewarm water, dissolve sugar and yeast. Leave it aside for 10-15 min. Add it to the batter. Cover the vessel and leave it to ferment overnight.
3. The batter will be well fermented by next day morning. About 2 hours before you make the appams, add salt and coconut milk and stir well to combine. 

Cooking

3. Heat the appam chatti (the one that is concave), pour a big spoonful of batter, swirl it around to spread, close with the lid and cook for about 2-3 min. Open the lid and remove the cooked appam to a casserole box. Repeat the process with the rest of the batter. It will make some 30-40 appams.

If you do not have appam chatti, you can make it in normal dosa pan, as you would make pancakes.

Serving

4. Serve with hot stew or sweet milk or coconut milk

I have some left still, which I will be having for today's dinner. Then I will click the picture and post it here.


Friday, 4 January 2013

Healthy Masala Oatmeal Upma

A great way to spice up your otherwise bland upma!


Having to get up in the morning to find your way into the kitchen and make your own cup of tea/coffee is such a boring way to start your day! To add on to that what if you have to get the breakfast ready before 7.30 AM. I so dislike this and for the same reason, mostly Pradeep leaves for office with just tea or tea with toast or a couple of fruits, although he prefers to start off the day with a healthy meal. Although I have, many times, displayed my unwillingness directly and indirectly to do that, some days you feel so lovey-dovey and wouldn't mind spending 30 min in the kitchen making a nice breakfast for him. So this recipe is the outcome of such a morning breakfast!


I had plans to cook suji upma, and started with spluttering the mustards. When I opened the kitchen cupboard to take suji, I saw some oatmeal in one of the containers, barely about 3/4th cup. There was a quick change of plan and thus I made oatmeal upma.

Ingredients

Quick cooking oatmeal - 3/4 cup
Onion - I medium, finely chopped
Carrots - 1/2 medium finely chopped
Olive oil - 2 tablespoon
Mustard seeds - a pinch
Urad dal - a pinch
Curry leaf - 1 spring
Turmeric powder - 1 pinch
Pepper - 1/2 teaspoon, freshly ground
Garam masala - 11/2 teaspoon
Lime - 1 juiced
Salt to taste
Sugar - 1 teaspoon
Water - enough to sprinkle to help cooking the oats
Coriander - to garnish

Preparation

Heal oil in a pan, splutter mustard seeds and add urad dal. Add the curry leaves, onions and carrots and cook for a couple of minutes, until onions are golden brown and carrots are almost cooked.

Add turmeric, pepper powder, garam masala and salt and fry until oil separates.

Add oatmeal and mix well to combine. Sprinkle water enough to wet the oatmeal (so that the upma is not too dry) and keep stirring for a couple of minutes. 

Add sugar and stir well. Switch off and squeeze the lime over the upma and mix well.

Garnish with coriander leaves and serve warm.


Oriental Green Beans Stir Fry

Very simple, but tasty, crispy and spicy accompaniment to rice!


In Singapore, food courts are a way of life. Most of the families there eat out and they find that to be a much cheaper option, well, may be, and food courts are where they frequent! You may be amazed to hear that some house owners are hesitant to rent their houses to Indian families there, because we cook and spoil the kitchen! (thankfully we never faced that issue) You will find a food court every other street, in malls and everywhere you can imagine. Some are classy, some are decent, but the best part is that whichever you choose, you will find one stall serving your favorite food. And believe me, all the shops make pretty decent food and some are just "out of the world". 


Of all the dishes I have tried, stir fried beans used to be  my favorite. I could eat it as it is or with plain steamed rice. They used to serve it sweet and spicy, and the beans used to look totally dark green (the fresh types) and crunchy enough. I have had many vain attempts to replicate the taste and the crunchiness in my home kitchen. 

Wondering why I am sharing the recipe then - because I feel this time I nailed it! (well, not 100% though) So here is my humble tribute to my then favorite dish. I believe you should be able to make it with any variety of beans.

Ingredients

Green beans - 1 bunch, (about 15-20), cut in to 2 inch size
Onion - 1 small, chopped
Garlic cloves - 5, chopped
Dried red chilies - 3 large
Olive oil - 1 tablespoon
Salt - to tate
Sugar - 1 teaspoon
Vinegar - 2 tablespoon

Preparation

Crush together onion, garlic and chilies in a blender without water.

Heat oil in a pan and stir fry the crushed mix for a couple of minutes.

Add the cut beans, stir well to combine. Add salt to taste. Do not cook for more than a couple of minutes as you want the bean to be cooked but retain its crunchiness. 

Sprinkle the sugar, and add vinegar. Stir well to mix and switch off the stove.

This is a wonderful side dish to go with rice or you can eat it as it is.

Thursday, 3 January 2013

Vanilla Chocolate Chip Muffins

Gorgeous spotted beauties that were also rightly moist and extra spongy!

Ever since I started baking, I have always wanted to gift someone something home baked. Well, that dream came true yesterday and first ever attempt to bake something to gift someone actually turned out awesome! Whether or not my friends enjoyed it (I hope they must have), I am totally proud of these muffins :-)


Initially I had plans to bake brownies but then somehow bumped into this recipe and just gave it a try. You have to touch it and bite into it to see how spongy it can be :-) So, give a try and be amazed! I wouldn't say this is quick, but pretty easy; everything from preparing the batter, lazing around, baking and then clicking snaps would have taken me 1.25 hours.


Ingredients

Salted butter - 100 gm, softened
Sugar - 12 tablespoon
Egg whites - 4 large, lightly beaten
Yogurt - 10 tablespoon
Vanilla essence - 1/2 tablespoon
All purpose flour - 2 Cups (28 tablespoon)
Baking powder - 1 tablespoon
Baking soda - 1/2 tablespoon
Semi-sweet chocolate chips - 8 tablespoons and more for topping


Preparation

1. Line the muffin pan with paper cups.

Cooking

2. In a large bowl, using and electric mixer, mix together butter and sugar well, until pale.
3. Add the egg whites and beat in medium speed until it turns creamy with firm soft peaks.
4. Add vanilla essence and yogurt and beat in low speed for a couple of minutes until well combined.
5. Sift together flour, baking powder and baking soda and fold in gently to combine.
6. Add the chocolate chips and fold in to get a thick batter.
7. Pre-heat oven at 180 degree Celsius. Spoon in the batter in the muffin cups leaving space for the batter to rise. Sprinkle with chocolate chips.
8. Bake for 25-30 min or until a toothpick inserted comes out clean.

Serving

9. Serve as breakfast muffins or just as I did, pack it up as a gift!


Tuesday, 1 January 2013

Herbed Fusilli Pasta With Citrus Dressing

Very light yet filling dinner for two!

Happy new year everyone! May be this dish has a special place in this food blog; for being the last dish I cooked in the year 2012 and the first I posted in the year 2013. 

So this time December 31st passed by with no noisy deal; no new year ball or partying, but just us both with good movie, food and drinks. To say the least, it was kind of fun! 


Well I love pasta (fusilli being my favorite) and probably anything Italian. I prefer it with cream sauce and I can adjust those with dressings, but I cannot handle the ones served with tomato based sauce (I feel it spoils the fun). So, it has been a while since I cooked pasta at home and I thought yesterday was the right time. 

Initially I wanted to cook shepherd's pie, however as the "raw materials" reached late, I went ahead with my own pasta recipe, because this is quick, light and healthy! 

Ingredients

Wholewheat pasta - 2 1/2 Cups (I used fusilli, you may use any other type)
Chicken mince - 1 Cup (as I said the raw materials for the pie reached late but well in time to make paste)
Onion - 1 medium, coarsely chopped
Garlic - 1 medium bulb, coarsely chopped
Dried chilies - 3
Olive oil - 25 ml plus 50 ml for dressing
Lime - 1 large, juiced (or vinegar)
Salt - to taste (when cooking pasta)
Italian herb mix - 2 tablespoon

Preparation

1. Cook the pasta with double the water, 2 teaspoon salt and 1 tablespoon of oil. Drain and keep aside.
2. Heat up a sauce pan with some oil and cook the chicken mince, with some salt and turmeric. I even added garam masala to give it some flavor.
3. In a blender, coarsely crush together the onions, garlic and chilies. Keep aside.

Cooking

3. Heat oil in a sauce pan and add the crushed onions, garlic and chilies mix. Fry for a couple of minutes. 
4. Add cooked pasta and mix well to combine. Pour in the lime juice. Stir again.
5. Add the cooked chicken mince, mix to combine. Pour in the olive oil reserved for dressing. Toss to combine.
6. Top with Italian herb mix.

Serving

7. Pair it up with some red wine.